
Taking control with Craftech
Welcome to another Galacticare Wednesday!
Introducing Craftech.
Craftech arose from our desire to take a leaf out of the god game design book and give players much more direct power and control than you might traditionally find in a management game.
As this notion is something fairly alien (heh) to the genre, the various systems and components went through many, many iterations, but our primary goal remained the same: We wanted to give players an arsenal of tools and powers to quite literally take their hospital to the next level.
Types of Craftech
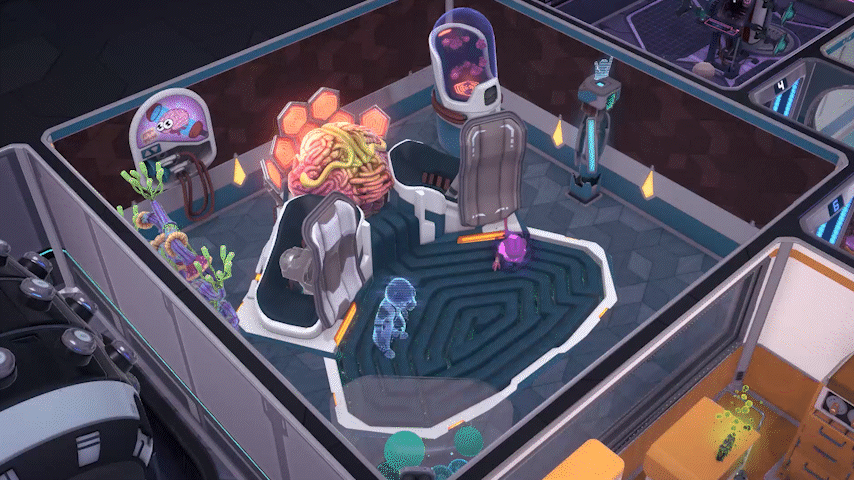
Room Upgrades
First up, room upgrades. Each room can be equipped with an upgrade that can dramatically improve or change how it operates.
For example, the Holo-Doc Emitter will - as you may surmise - generate a holographic doctor to work in the room. This holographic doctor may seem like the perfect employee; it will work tirelessly without breaks (or even a salary!). However, they are not as effective as regular doctors, nor are they able to gain experience and level up.
Or you could opt for the Efficiency Regulator, which can triple the amount of credits that a room generates per treatment. These can be especially handy as you are growing your fledgling hospital.
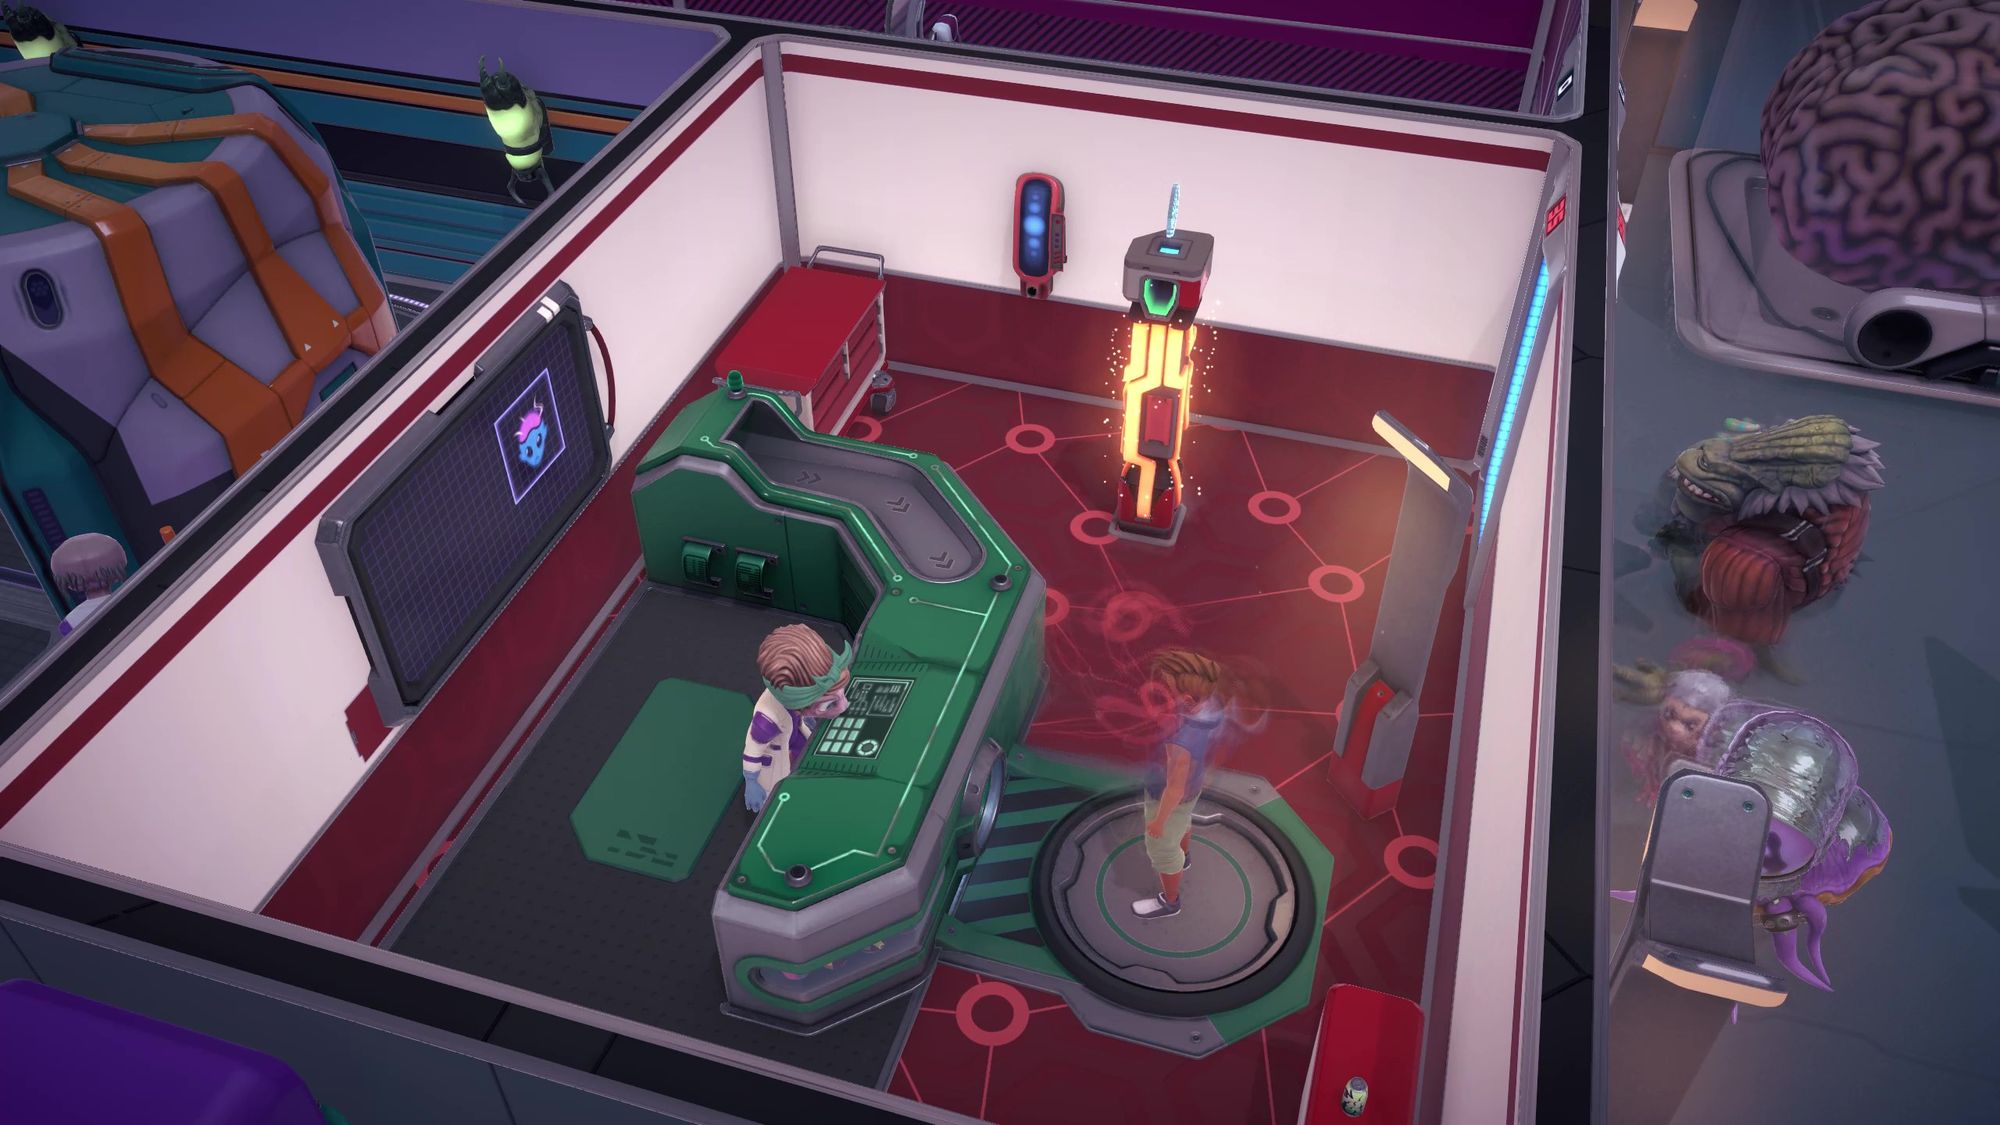
Corridor Upgrades
Outside of your rooms, there are also numerous Craftech items which can be used to enhance the corridors of your hospital.
The Bio-Stasis Beacon projects a large aura which reduces the health decay of all patients in a large area. This can allow you to create effective waiting areas which keep patients alive (and able to pay their bills!) even if your wait times are excessive.
And the Teleportation Pad does exactly as you’d expect: It can instantly teleport both patients and staff across the hospital to any other Teleportation Pads you have built.

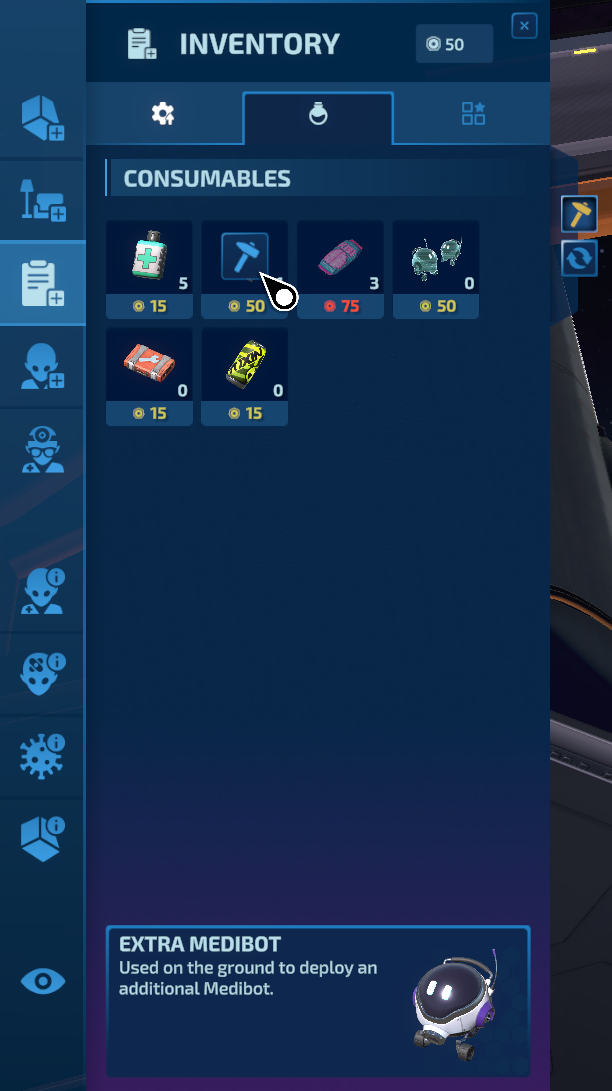
Consumables
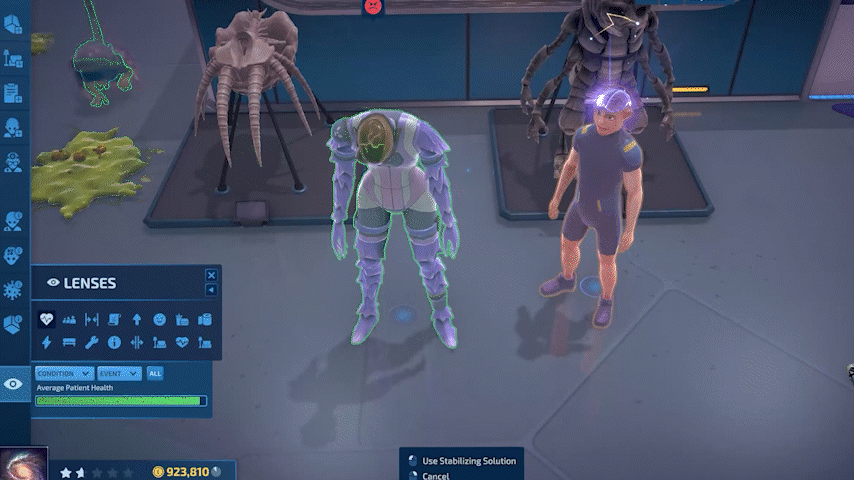
Finally, we have one-use consumable items. Usually you’ll gain these in packs of two or more, allowing you to use them fairly liberally.
You can make use of some Stabilising Solution to fully restore the health of a single patient by simply dropping it on top of them. This will allow you to bring a patient back from the brink of death, giving you plenty of time in which to treat them. Ideal for emergency situations where you find yourself overwhelmed.
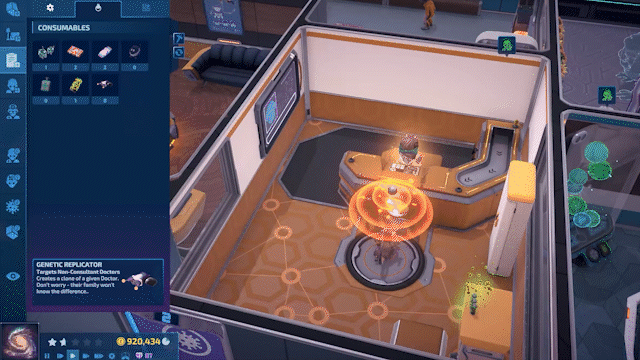
If you find yourself particularly attached to a particular doctor, why limit yourself to just one of them? The Genetic Replicator allows you to clone any of your non-Consultant doctors. It’s perfectly painless. Probably.
Rules Methods of Acquisition
Mission Rewards
The first and most straightforward method of acquiring Craftech is by completing objectives. Every task completed will grant a bevy of rewards, including a handful of Craftech items.
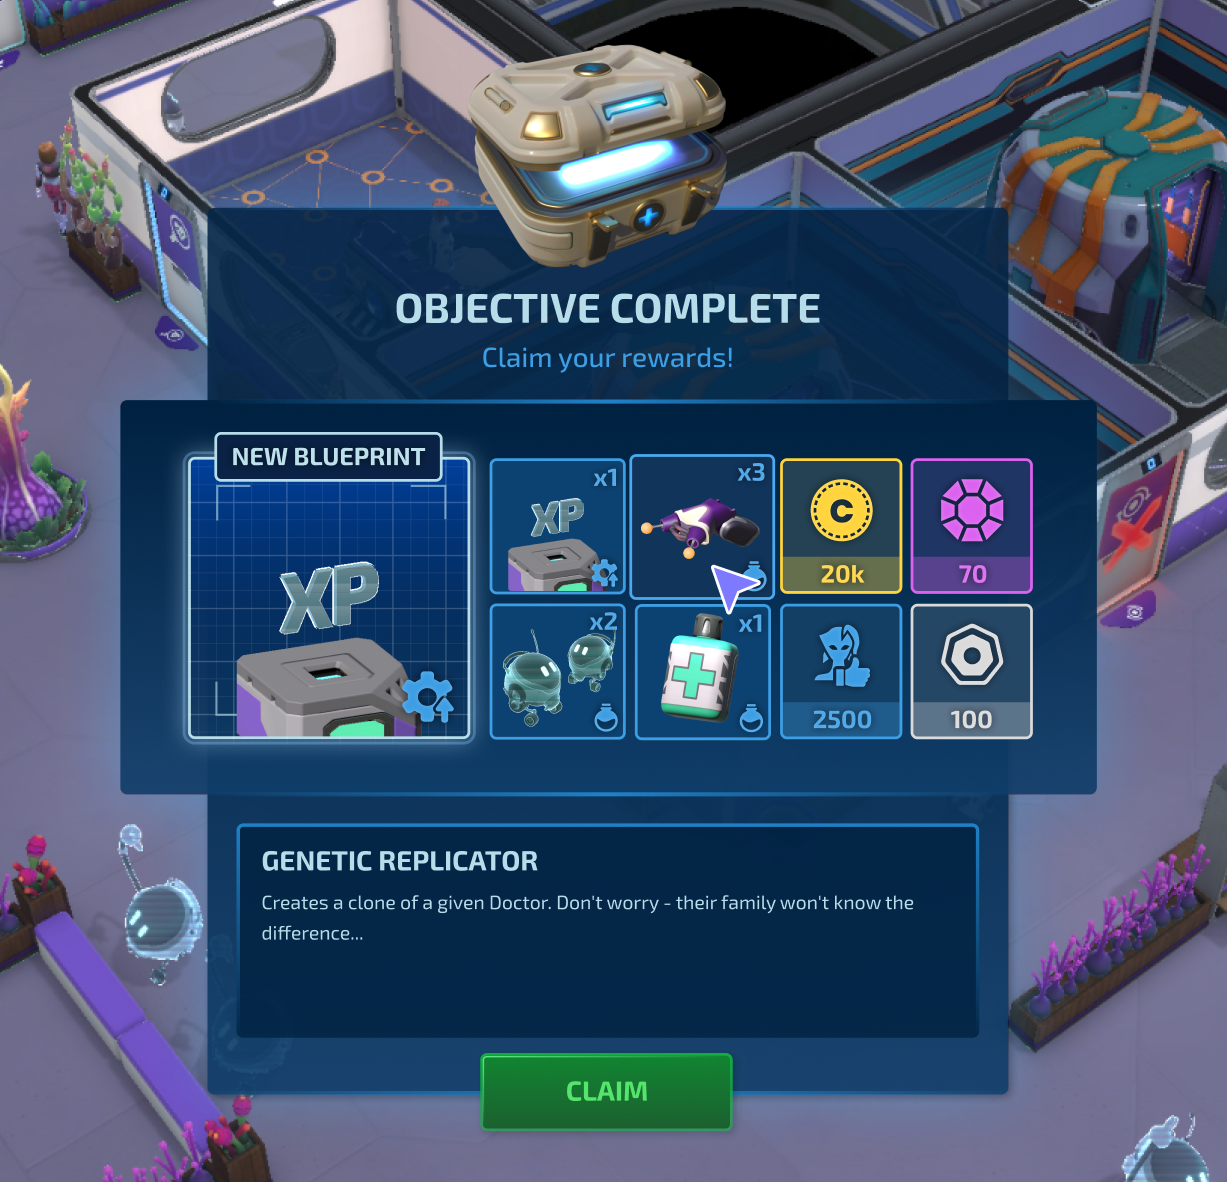
Generally these will be geared towards the mission you’re currently on, but you’re always able to salvage any Craftech items you don’t want to use. Speaking of which…
Blueprints & Crafting
The first time you encounter a new Craftech item you’ll automatically be given its blueprint. Using Craftium (which, as you may guess, is the special crafting resource) you’ll be able to craft more of any Craftech item you have a blueprint for. Any blueprints you have are taken with you from level to level.
As mentioned above, you can gain Craftium by salvaging any Craftech items you don’t want to keep, and you’ll also get some Craftium every time you complete an objective. You can also collect Craftium by catching Craftles, friendly critters which are attracted to your hospital by decorative objects (we’ll be talking more about critters in a future blog post!).
To further enhance your crafting exploits, you can research advanced blueprints in the Research Lab. These advanced blueprints will allow you to craft items at a significant discount, allowing you to more efficiently specialise in the upgrades and items you enjoy using the most.
Baz, the Travelling Merchant
Bazzanorrothogoria (or ‘Baz’ to his friends), a Colossal you meet at the beginning of the game, will routinely visit the hospital to offer you a random selection of Craftech items in exchange for your hand-earned credits.
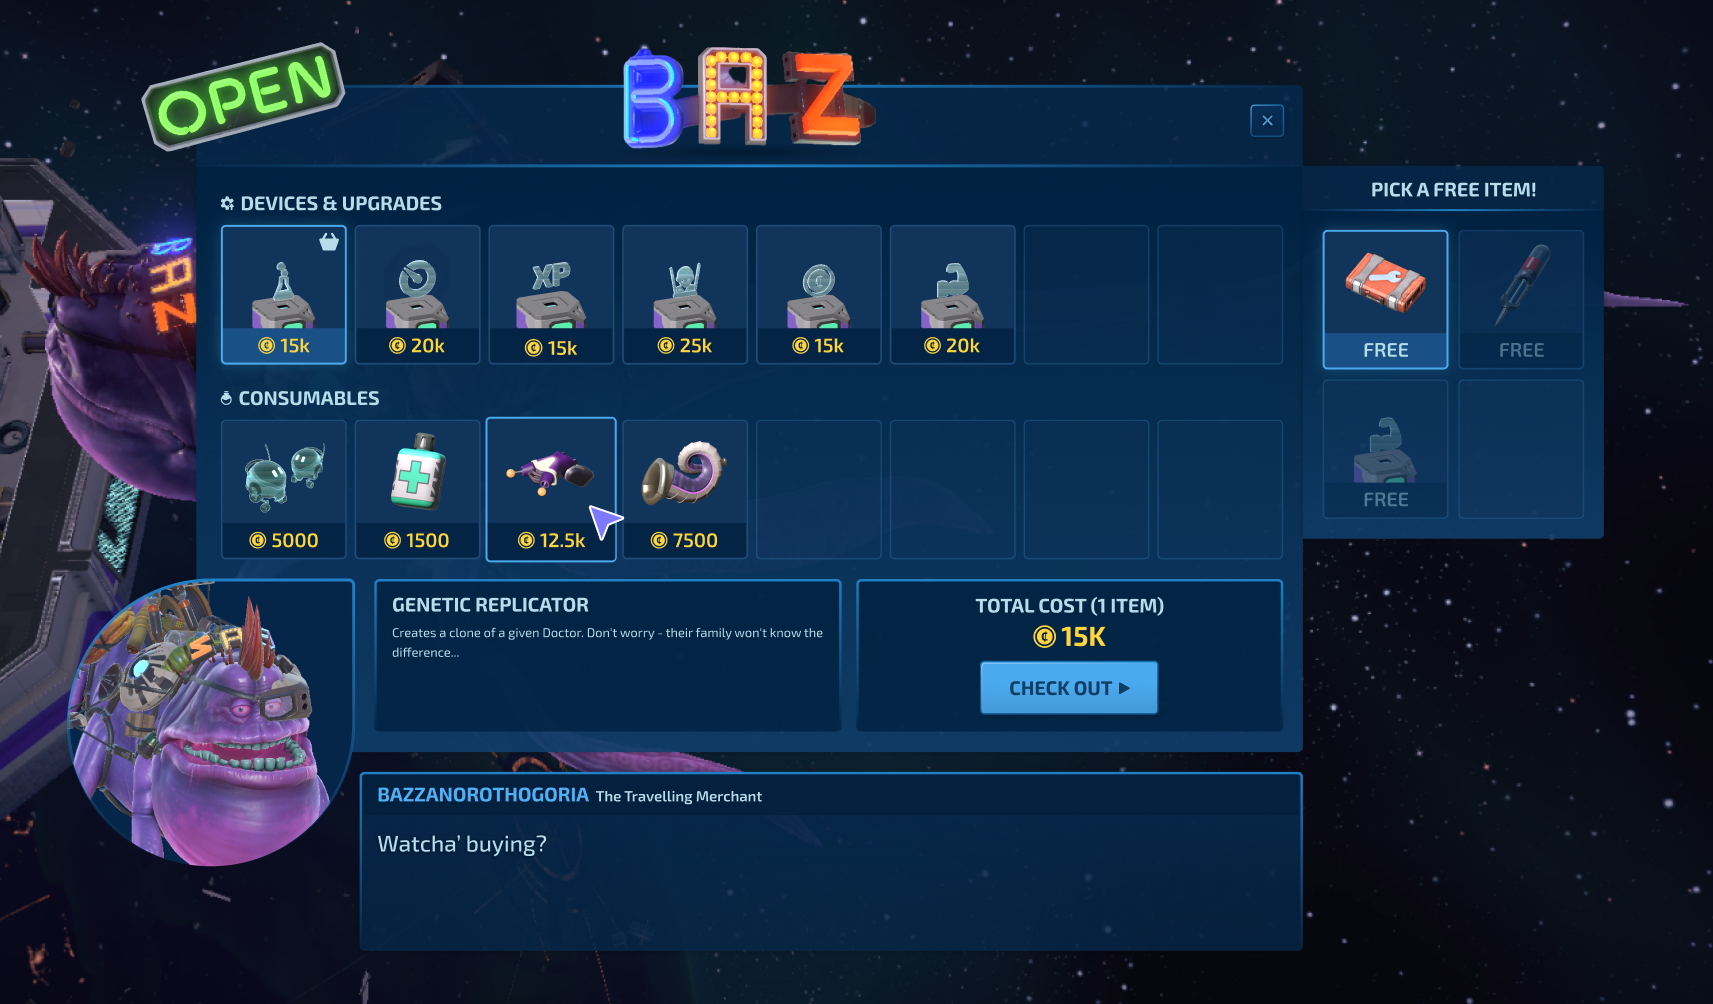
Baz will also always offer you a free item as thanks for helping him out, so it’s always worth checking the shop out when he visits even if you can’t afford to buy anything!
Crafting Craftech
The various systems involved went through many iterations over the past few years. Most notably, many of these components began life as independent features before eventually being wrapped up into Craftech.
For example, room upgrades were originally going to be small, invisible stat enhancements with space for up to three upgrades per room. As the system evolved, we pivoted to only allowing one upgrade in order to allow them to be much more powerful (such as the Holo-Doc described above).

The primary driver for this change was us wanting each individual decision to be more meaningful and impactful. Three upgrades which provide +50% money, research or experience each aren’t super exciting on their own, but an upgrade which triples the income from one room? That’s much more noticeable.
We also eventually decided to give these upgrades a physical presence in the world. We initially made the decision for them to be “invisible” so they didn’t get in the way of your all-important decorations, but the desire to be able to physically see and interact with the upgrades eventually won out.
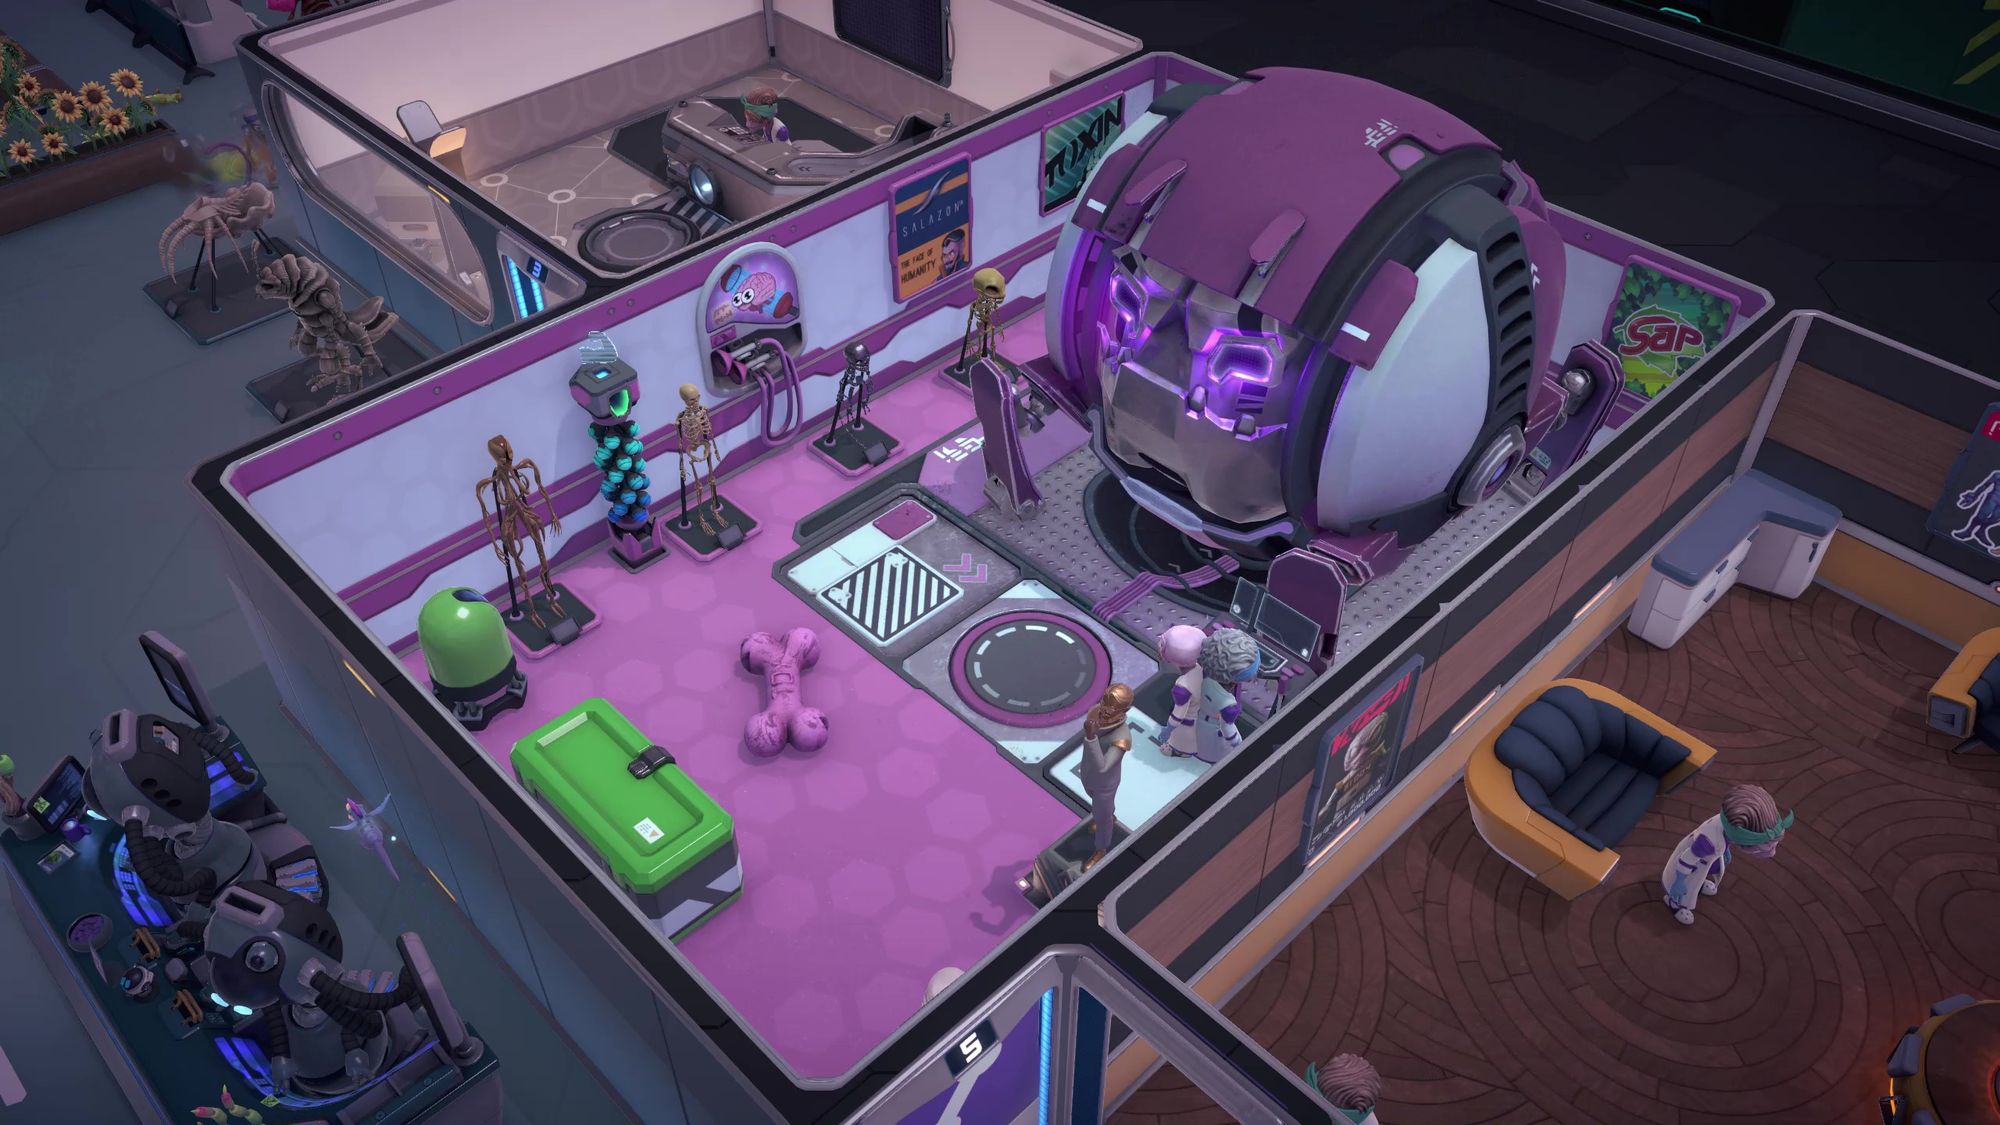
The compromise was to significantly limit their footprint in order to maximise the amount of space available for plants, sculptures, skeletons, and whatever else you may wish to adorn your treatment rooms with. A small footprint doesn’t necessarily mean a small object, though.
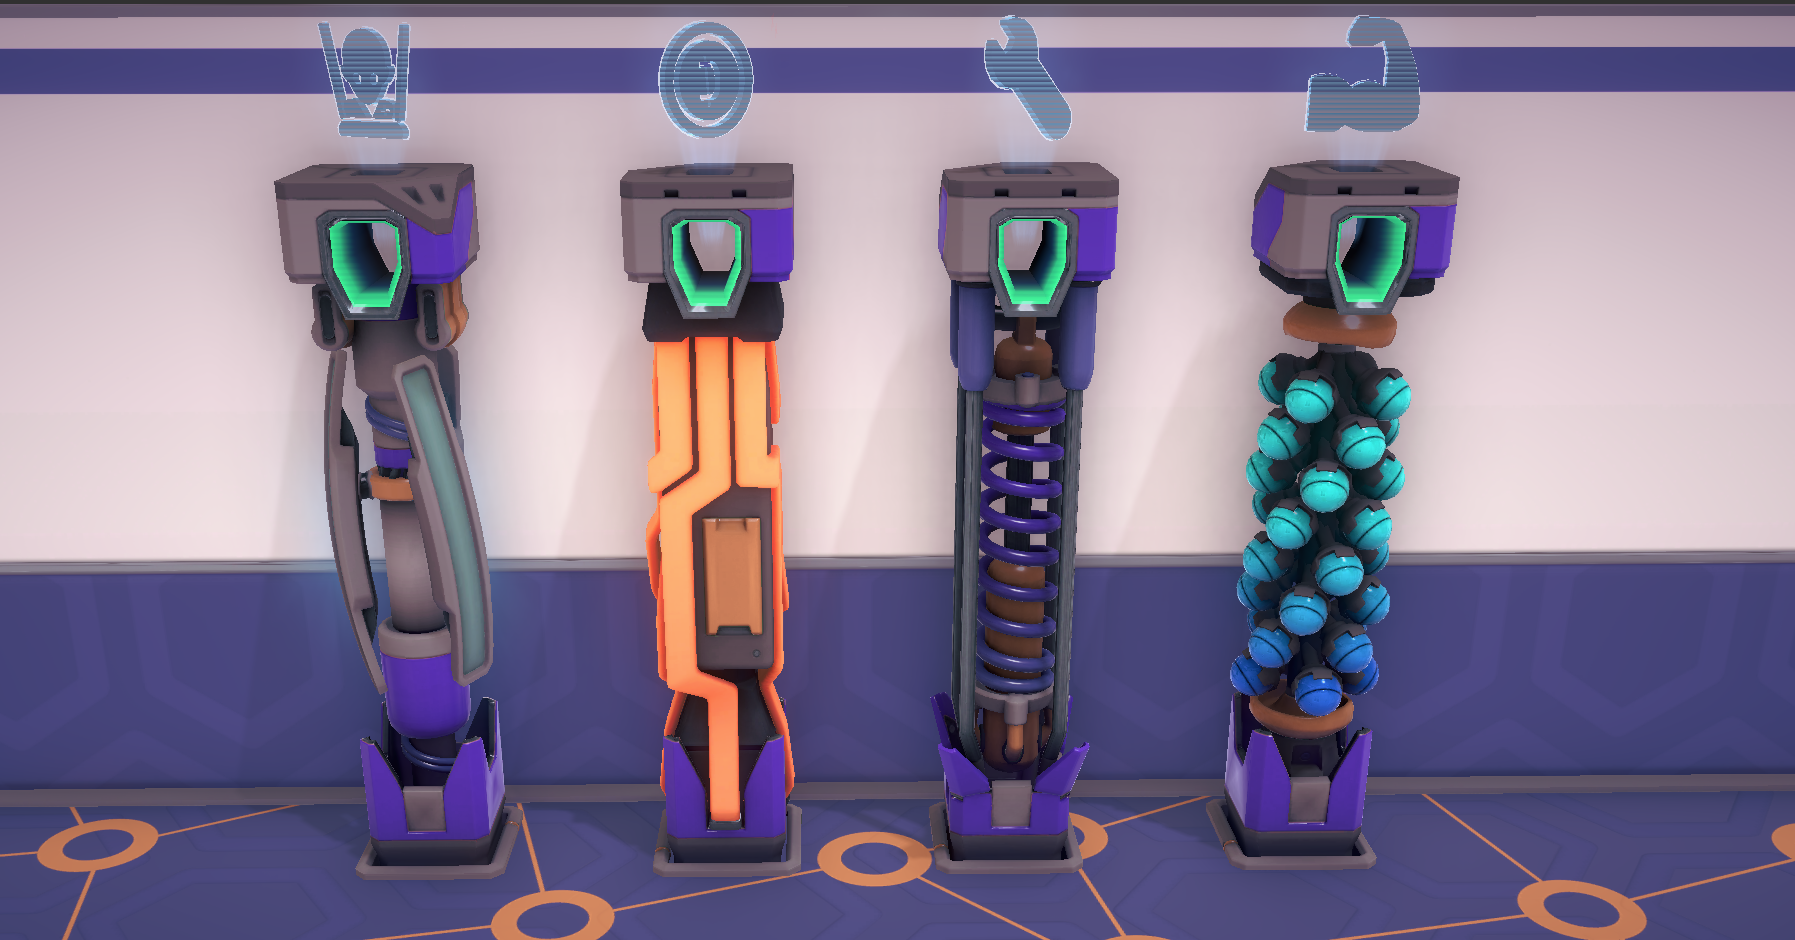
We landed on these high-tech totem pole-like devices to represent our various upgrades. As with all our decorative objects they will dynamically recolour themselves to match the room they are in*, so they’ll fit in with any style of decor you choose for your Boning Chamber.
*You can, of course, individually recolour any object at any time if you aren’t a fan of consistent colour schemes.
The travelling merchant also evolved quite a bit. The original aim was to provide a way for the player to access various systems - room upgrades, more Medibots, and consultant equipment (RIP) - in a friendly and characterful way (characterfulness being a key goal for us throughout the entire game with all of our species, conditions, rooms, and systems).
The merchant was originally just some guy called Derek Voidborne. But… he was just a regular human guy. Not the most interesting thing. So what’s cooler than some regular human guy?

A giant space whale, of course. Baz, our colossal companion (voiced by the wonderful Richard Ridings of War for the Overworld, Dungeon Keeper and Peppa Pig fame), was incredibly well suited to the role; he’s even able to carry his shop on his own back. The height of convenience!
Consumables, corridor upgrades and crafting all came later.
We always wanted to include something akin to spells in Galacticare. Little tools that let you slightly bend the rules of the game and really let you feel powerful. It wasn’t until we started having an inventory of items (which originally contained only room upgrades and consultant equipment) that the consumables system had a palace to live, and we quickly started to introduce items like the Stabilising Solution and Genetic Replicator.
As for corridor upgrades, these became a natural extension of the room upgrades. Providing meaningful choices when building didn’t need to be restricted to just your rooms - items like Teleporter Pads allowed you to make interesting decisions in how you shaped the fabric of your hospital.
The last piece of the puzzle was crafting. As all these systems began to mature, we eventually realised that giving the player more agency was going to be vital to allow everyone to truly create the hospital of their dreams. Instead of being limited to what Baz and event rewards gave you, crafting allowed you to direct your resources towards the consumables and upgrades you find the most fun whilst still allowing external rewards to feel meaningful due to the limited supply of Craftium.
Also this week, we've explored a new, parasitic condition in our Condition Research Journals called Glub Bite. Tomorrow, we'll begin exploring a new affliction that we hope isn't too much of an invasion of your space.
And that's it for this week's Galacticare Wednesday!
We hope that delving into the different types of Craftech, as well as how to acquire and craft them has brought you another facet of fun to the game that you can use once you bring your hospital to the next level.
Don’t forget we publish a new deep-dive blog post once a month, and more weekly explorations (including daily Condition Research Journals) across our TikTok, Twitter, and Discord.
See you next week for another instalment of Galacticare Wednesday!
Brightrock Games Newsletter
Join the newsletter to receive the latest updates from the studio straight into your inbox.


